Some schools wanted to be able to sell stuff on their website so we created the Online Stores module.
We designed the Online Store module to be as simple as possible because most Stores we've seen are exactly the opposite. It's everything you need to run a basic Store from your school.
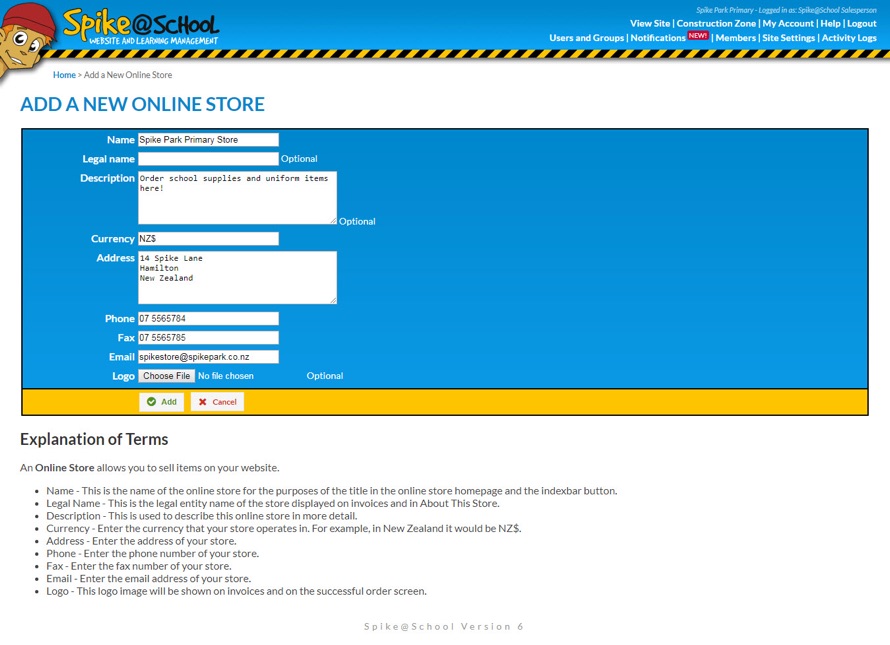
You can have as many Stores on your website as you want, but most schools will only want one. Let's add an Online Store from the ‘Add a New’ menu:
Adding Categories and Items to your Online Store
When you create an Online Store you can give it a Name, Description, Currency, Address, Phone Number, Fax Number and Email Address. You can also upload a School Logo which will be shown on invoices.
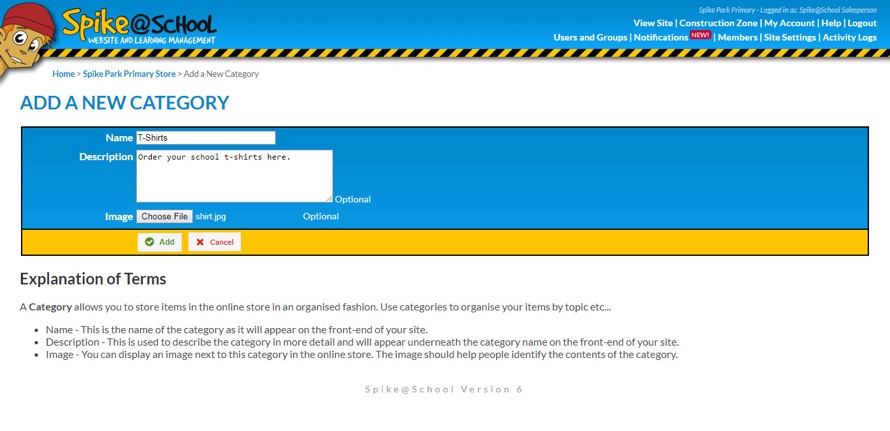
When your Store has been made you can click on it to start adding Categories and Items. Categories are a great way to make your Online Store easier for people to navigate and locate the Items that they are looking for. You can also add Images to help define your Category.
Let's add a Category:
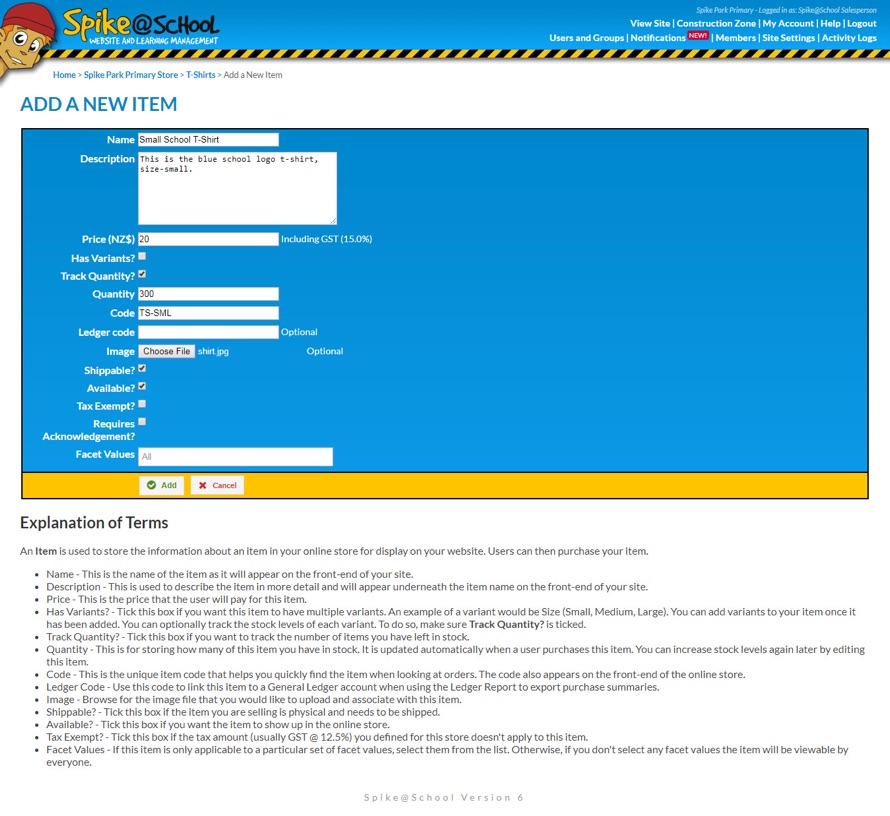
Now lets add an Item to the Category. You give your Item a Name, Description and a Price. You can indicate if your Item has variants and enter how many you have in stock. The quantity of Items can also be tracked. Each Item should have a unique Code. If you have an Image of the Item you can upload that also. Finally, you can indicate whether the Item is shippable, whether it's currently available, and whether it's exempt from Sales Tax.
Editing your Store Settings
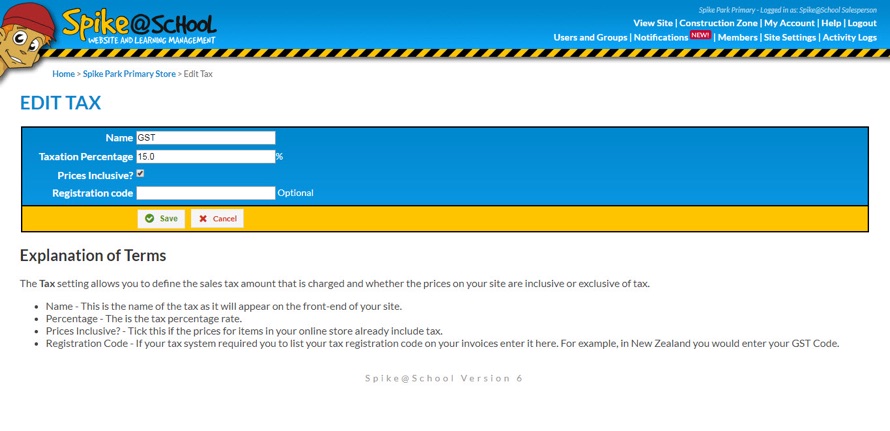
Now that we have an Item in our Store we just need to double-check a few things. In the Store view we can edit the Tax Settings. The Tax Setting is set for the New Zealand GST system by default but if you are from another country you can change this.
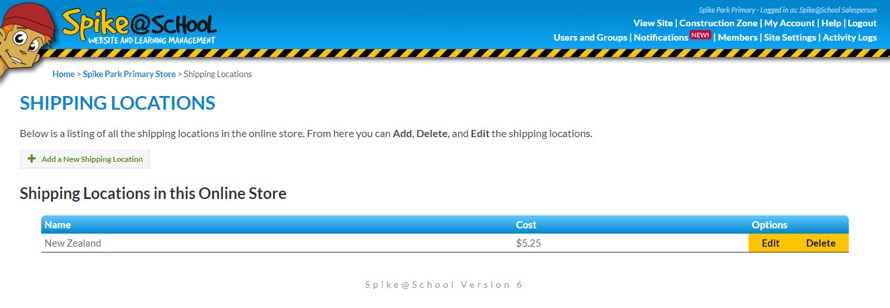
You can also edit the Shipping Locations. Here you can add as many Locations as you like. If you only want to ship within New Zealand you could just add one Location called ‘New Zealand’ and give a Price to ship products to this destination. This would prevent people purchasing Items when they are overseas as they would be required to enter a valid Shipping Location. You could even split New Zealand into ‘North Island’ and ‘South Island’ and give different Shipping Prices for each.
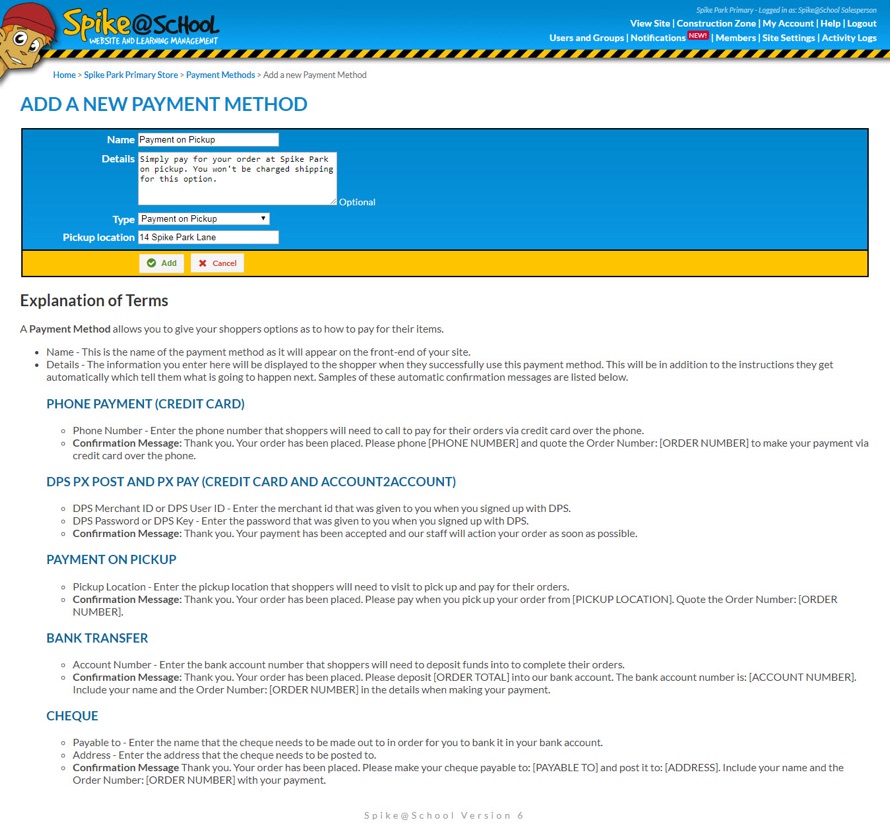
Finally, you can manage Payment Methods. There are 5 supported Payment Methods:
- Payment on Pickup - This allows people to pick up their Orders from the school. They won't be charged shipping on this Payment Method. You can enter an Address from which they can pick up the goods.
- Phone Payment (Credit Card) - This allows people to do exactly that, pay you via Credit Card once they've submitted their Order on the website. You can enter a Phone Number for them to call.
- Bank Transfer - This allows people to place their Order and then transfer the money to pay for the Order via Online Banking. You can enter a Bank Number here for them to pay the funds to.
- Cheque - This allows people to place their Order and then pay for the Order via Cheque. You can enter who the Cheque is to be made out to.
- DPS PX Post (Credit Card) - You can have your customers enter their Credit Card numbers securely on your website and Spike@School will verify the numbers instantly via your subscription to DPS New Zealand and record their Order if the payment is successful. You can enter your DPS Username and Password here.
Browsing your Online Store
Now that we've set up our Store we can browse to it on the website. You'll first be presented with the Categories of your Store. You can click on one of them to see the Products.
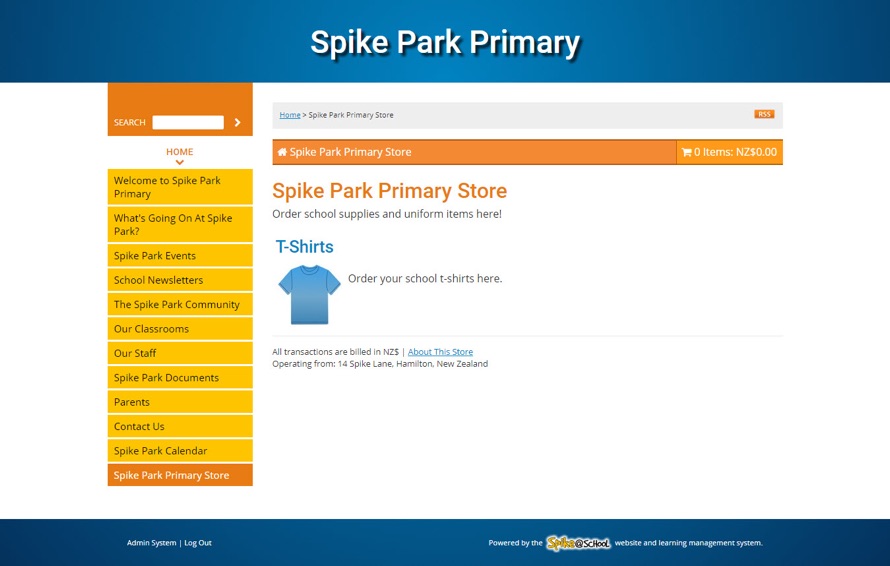
You will be able to see all of the Products in this Category. You can then add a Product to your Cart by clicking ‘Add to Cart’.
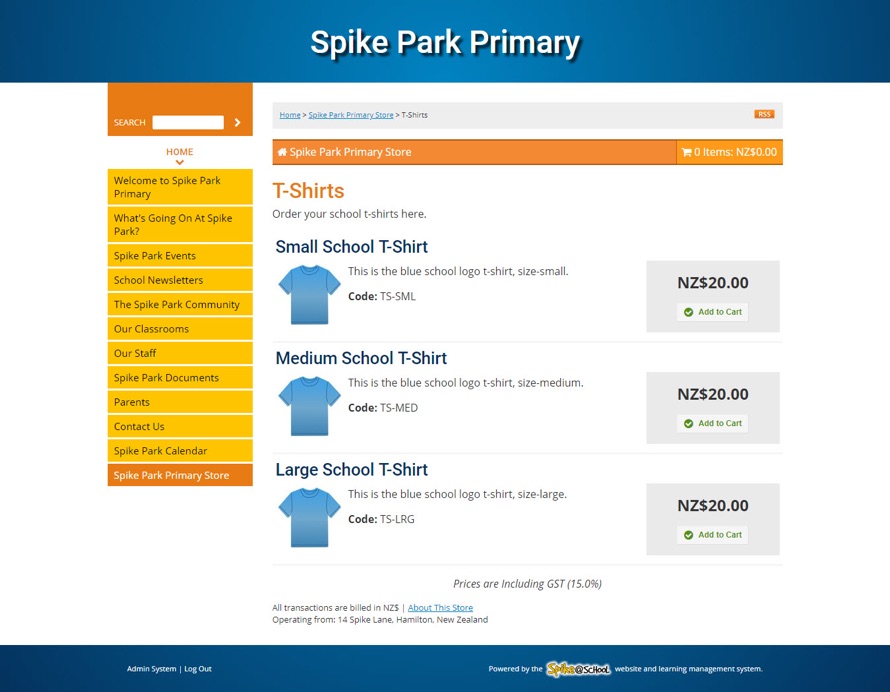
Ordering Items from your Online Store
As you click on ‘Add to Cart’ the Items will be added automatically to your Cart. You will see a green banner message telling you that the Item was successfully added to your Cart and you will be able to see the current value of your Cart beside the shopping trolley symbol.
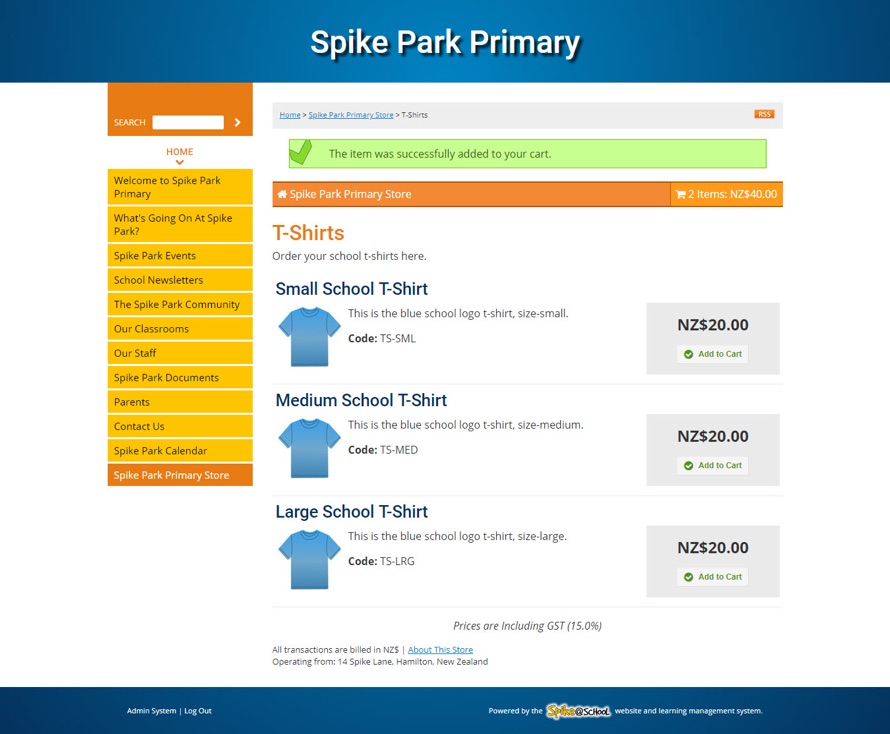
Once you've finished shopping you can click on the Cart symbol to be taken to your Cart view. You can then tweak Quantities here, or proceed to the Checkout.
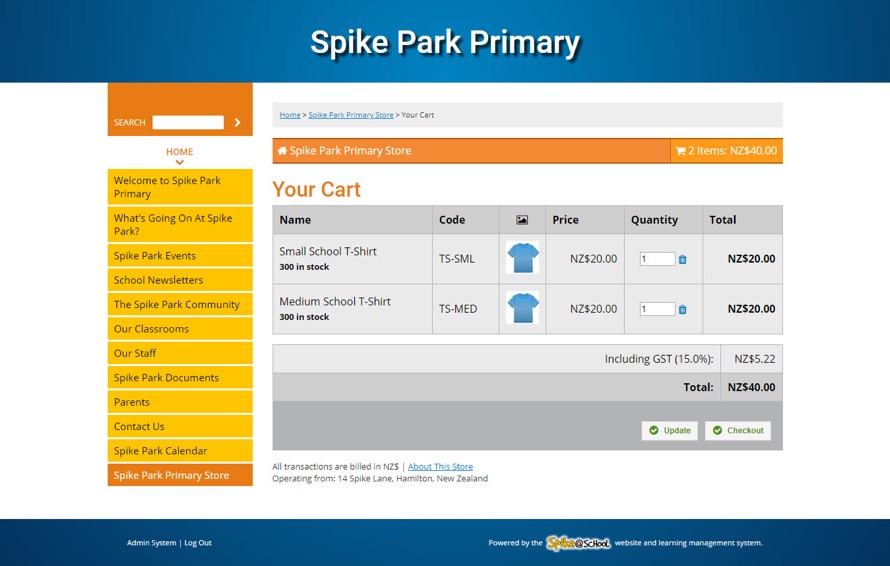
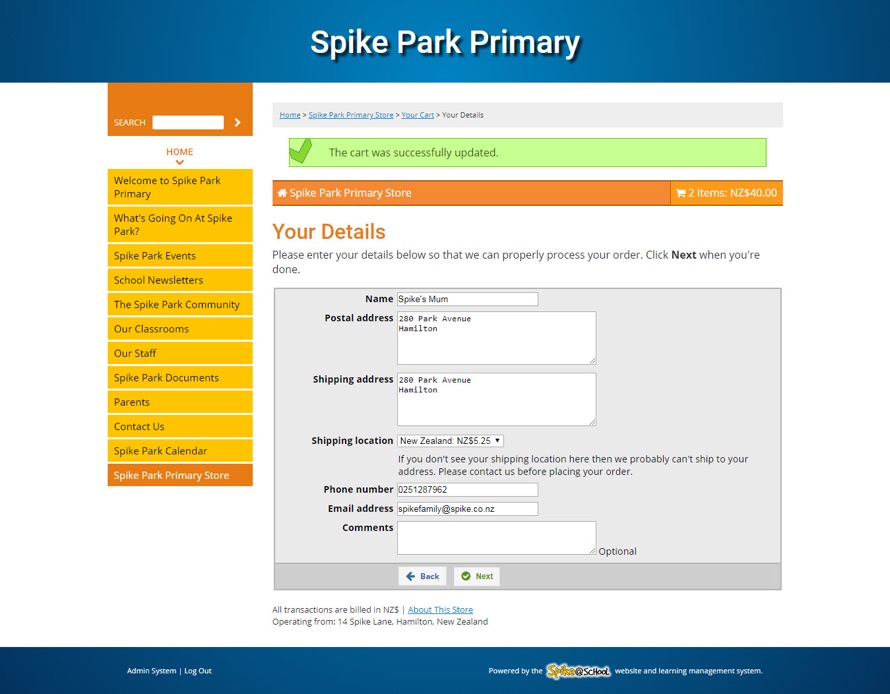
Here you can enter your Customer Details, including Shipping Details, Phone Numbers and Comments, before proceeding to the Payment page.
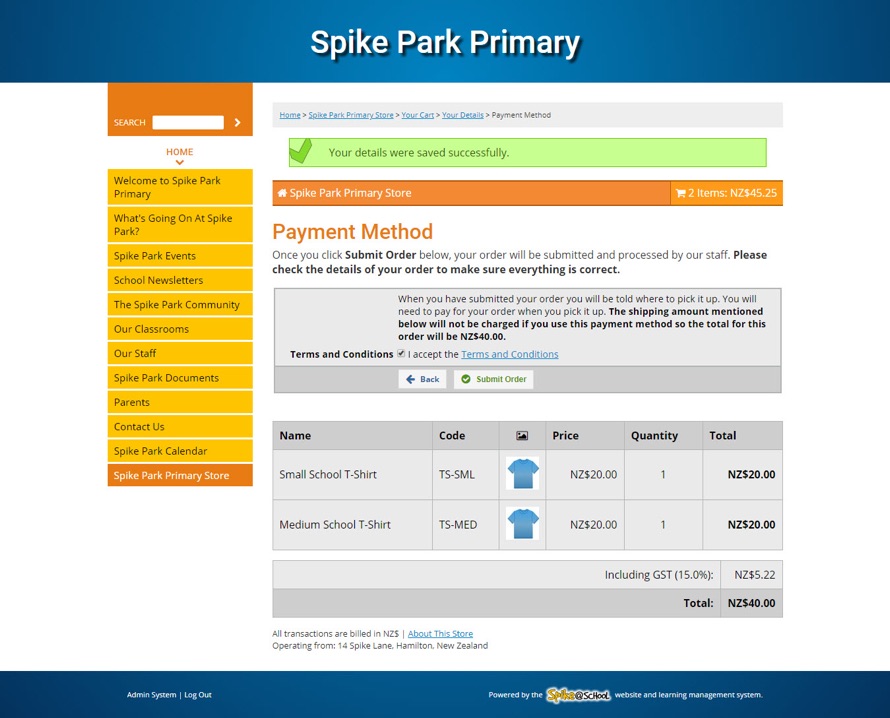
From here you can select your Payment Method and confirm your Order and it will be added to the Orders list in the Shop Admin System.
You will be told that your Order was successful and you will be emailed an Invoice in addition to being shown one on the screen.

Managing Orders from your Online Store
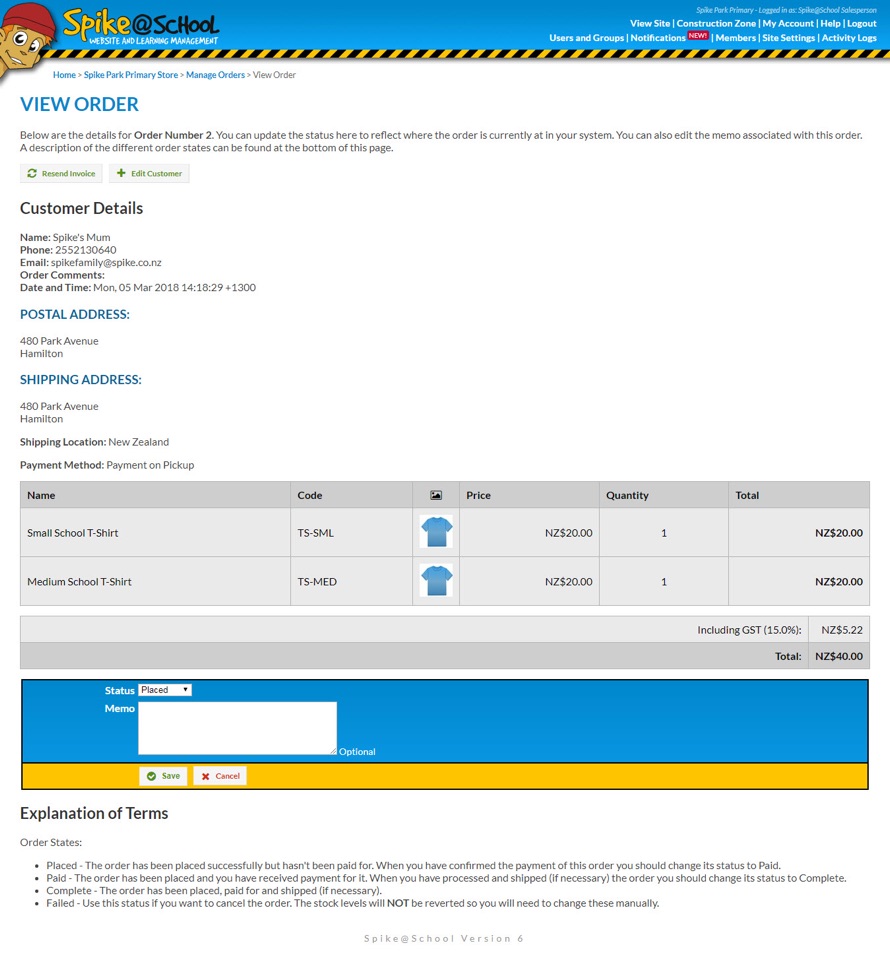
Returning to the Online Store admin area within the Construction Zone, you'll then be able to click ‘Manage Orders’ within the Store. This shows you all the incomplete Orders and you can then ‘View’ each Order individually.
The Order viewing page shows you all of the info on which Items were purchased and at what price. From here you can resend an Invoice, edit Customer Details, enter a Memo about the Order or change its Status depending on what has happened with it regarding payment and shipping.