
The Quizzes system in Spike@School allows you and your students to create automated Quizzes on your school website and inside your Learning Caves and ePortfolios.
There are three types of Quizzes that you can create: True or False, Fill in the Blanks, and Multiple Choice. These are all marked automatically by Spike@School and the results are then shown to the person taking the Quiz as soon as they're finished.
Let's dive in and see how it works. We'll start by adding a new Quiz Set from the ‘Add a New’ menu in the Construction Zone:
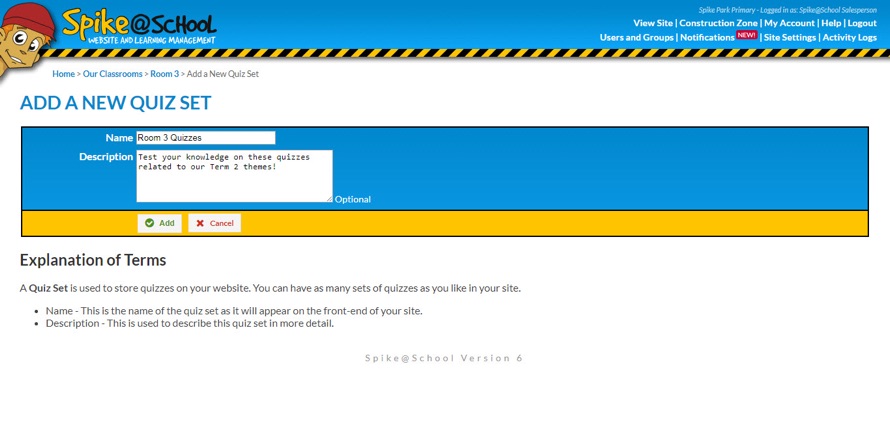
Creating a New Quiz
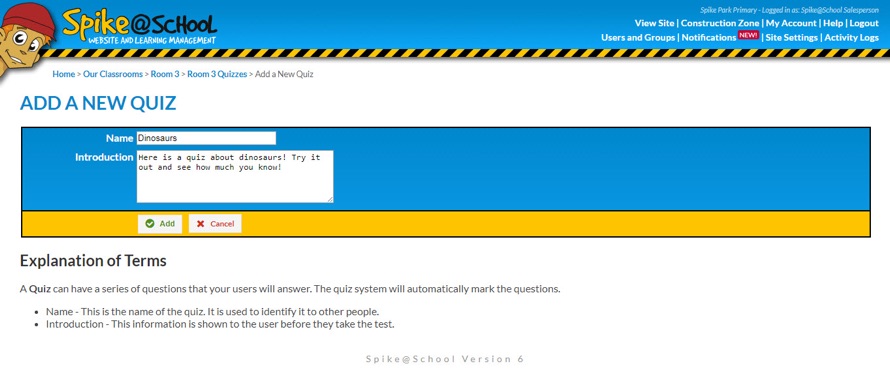
Once you've added your Set you can click on it and add a new Quiz. A Quiz just needs a Name and an Introduction.
We then click on the Name of the Quiz and click ‘Add a New Question’. First we'll add a True or False Question. As you can see, we give the Question a Name. We can then choose the Type - in this case we chose ‘True or False’. We then type in the Statement and specify if the correct answer is ‘True’ or ‘False’.
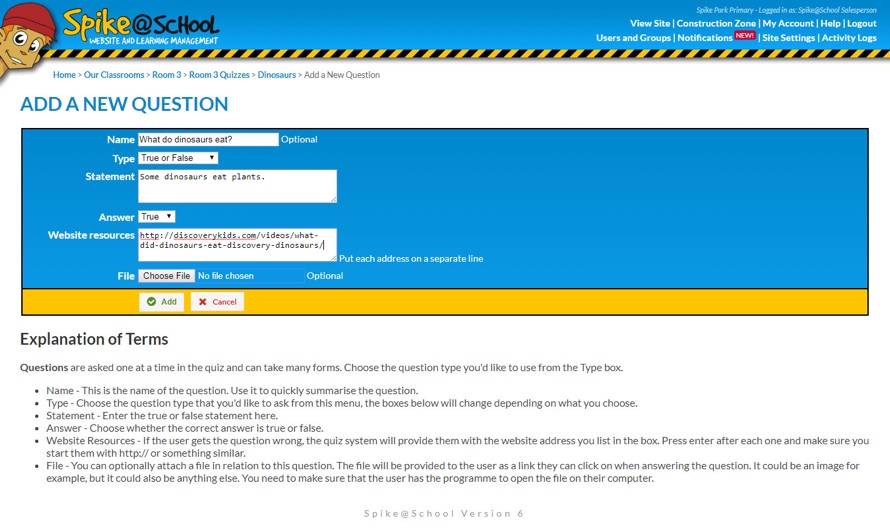
At this point, the Question is complete, however for all 3 Types of Questions you can also attach a File to the Question (e.g. an Image File) or paste multiple website addresses (one per line) into the Website Resources box. The File will be shown to the person answering the Question so you can instruct them to use the File to help them answer.
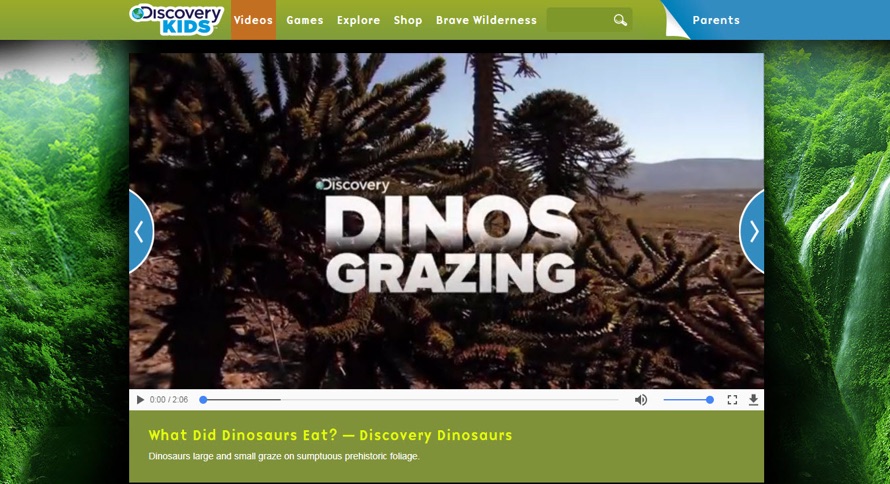
The Website Resources are shown to the person at the end of the Quiz if they get the Question wrong. In this case I've added a link to a video clip that talks about dinosaur diets. We'll see how this works in a minute. Now that we've filled out the form we'll click ‘Add’. We'll be taken back to the Questions screen.
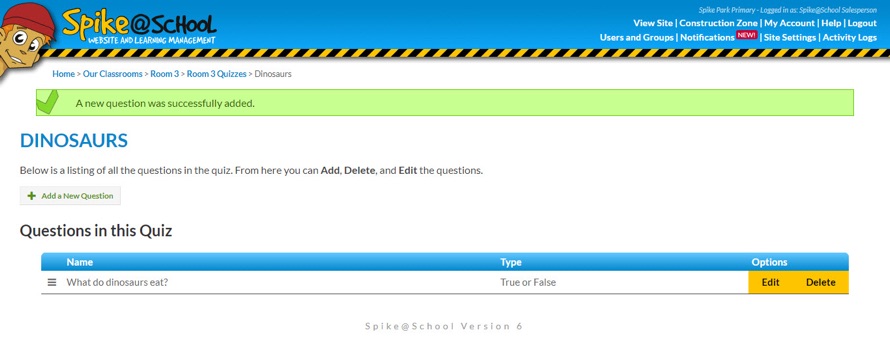
Just like any other interface in Spike@School you can Edit and Delete the Question at any time. You can also reorder Questions once you have more than one.
Let's add a couple more Questions.
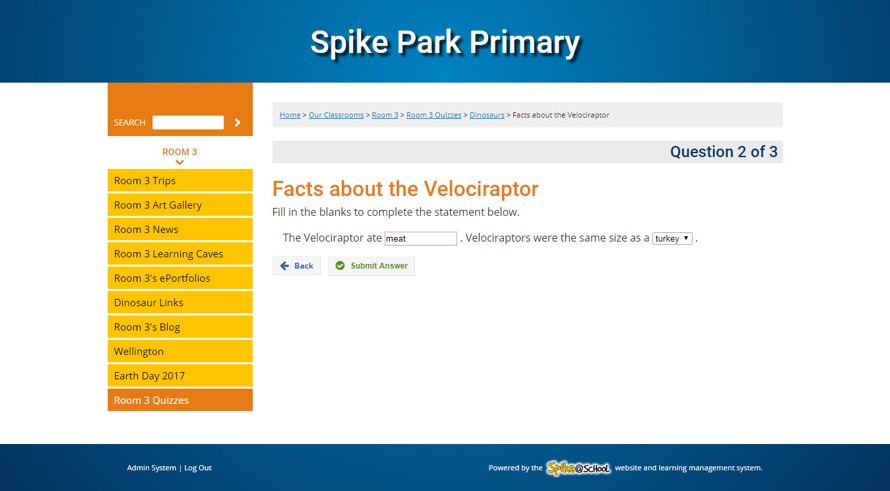
We'll add a Fill in the Blanks Question. We do this by clicking ‘Add a New Question’ and then selecting ‘Fill in the Blanks’ under Type. Fill in the Blanks Questions are a little more complicated to create. You still need to enter a Name and create a Statement in the Answer field - which is basically a statement with words blanked out. There are two types of Blanks - Empty Blanks, and Multi-Choice Blanks.
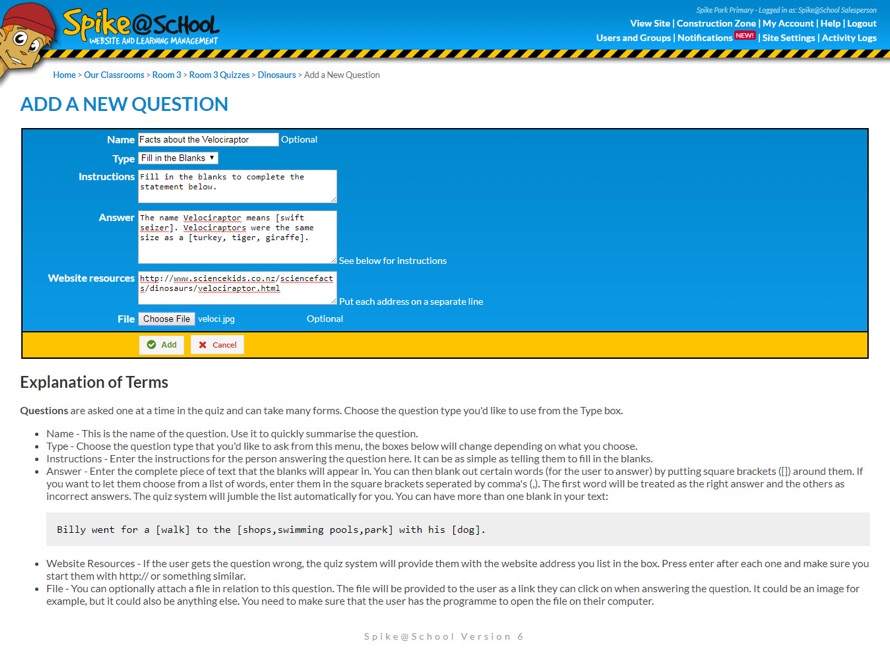
In this example, we've created an Empty Blank for the word ‘meat’ by putting square brackets around it. The person answering this Question will be expected to type the word ‘meat’ into that blank spot.
In the second case we've provided a list within square brackets of comparably sized animals for a Velociraptor, with each separated by a comma - this will be displayed as a drop-down list containing all three values. This is a Multi-Choice Blank. The system assumes the first item in the list is the correct answer, and will jumble the possible answers when presenting the Question to the visitor.
Again, we've provided a link to a website that discusses the topic that the Question is about. Once we’re finished we’ll click ‘Add’ and then add one last Question.
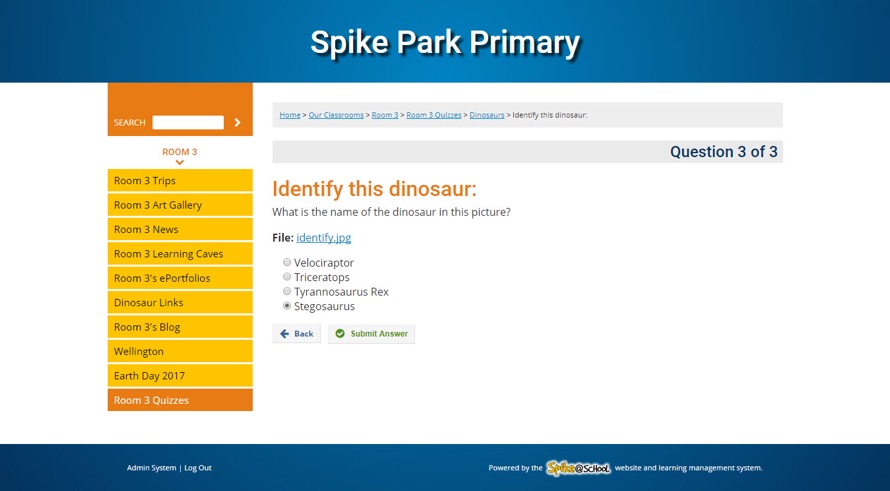
This time we’ll add a Multiple Choice Question. There are two Types of Multiple Choice Questions that you can create with Spike@School - Questions with one correct answer, and Questions with more than one correct answer. We’re going to create a Question with only one correct answer.
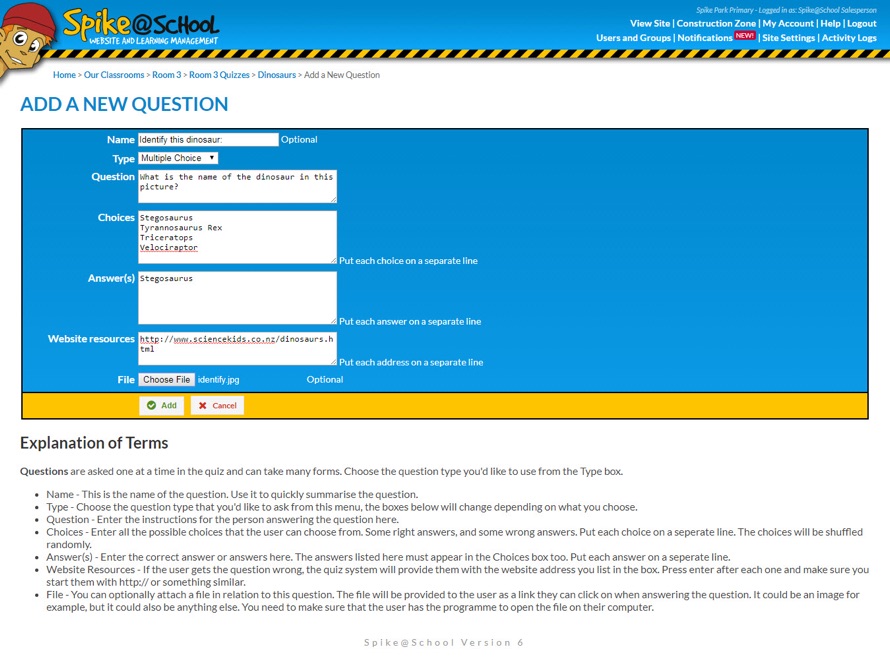
This will be presented to the visitor as a list of jumbled answers each with a Radio Button beside it. The visitor will only be able to choose one answer.
If you had added more than one right answer, the visitor would be presented with the same list but instead there would be Checkboxes beside each answer allowing the visitor to tick more than one answer. In this case, the visitor must choose all the correct answers for the Question in order to be marked as ‘correct’.
I've also attached an image file to this question which will be used by the user to answer the question.
After clicking ‘Add’ we'll have three Questions in our list. Let's take the Quiz!
Viewing Your Quiz
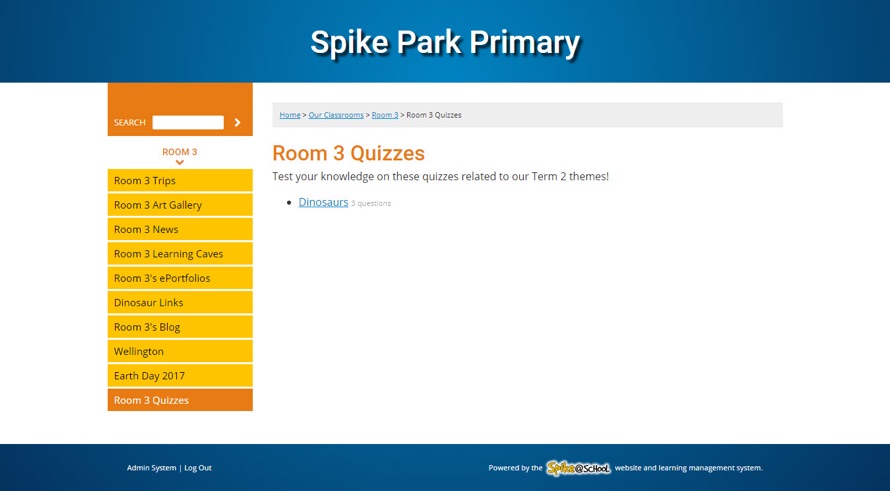
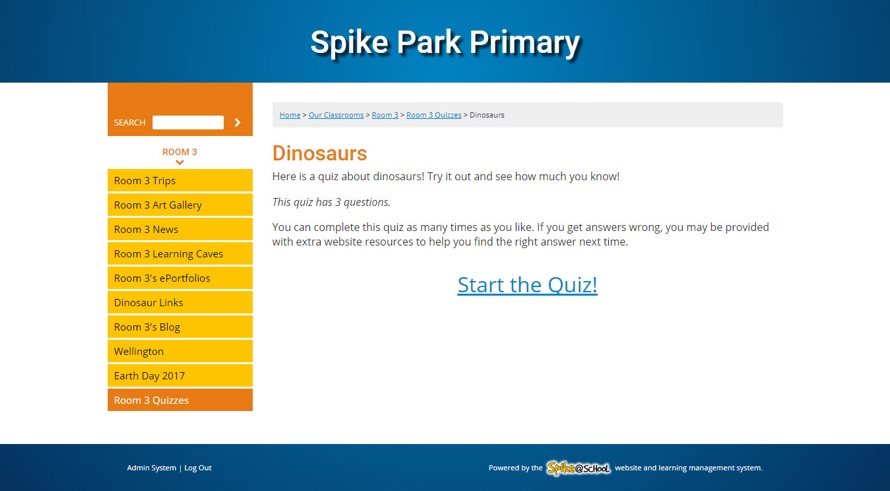
To view the Quiz simply head to the front-end of your website and click on the Name of your Quiz Set. As you can see, the list of Quizzes in your Set are shown to the visitor. We'll click on the Dinosaurs Quiz.
The Introduction that we entered while first setting up our Quiz is shown to the visitor and a big link indicating that they can take the Quiz is also shown. Let's click on ‘Start the Quiz’ and see how much we know about dinosaurs.
Once the visitor answers each Question they can click ‘Submit Answer’. They can also choose not to answer the Question, or go back to Questions at any time, by using the ‘Back’ button which will appear after the first Question. They can also change their answers before the end of the Quiz.
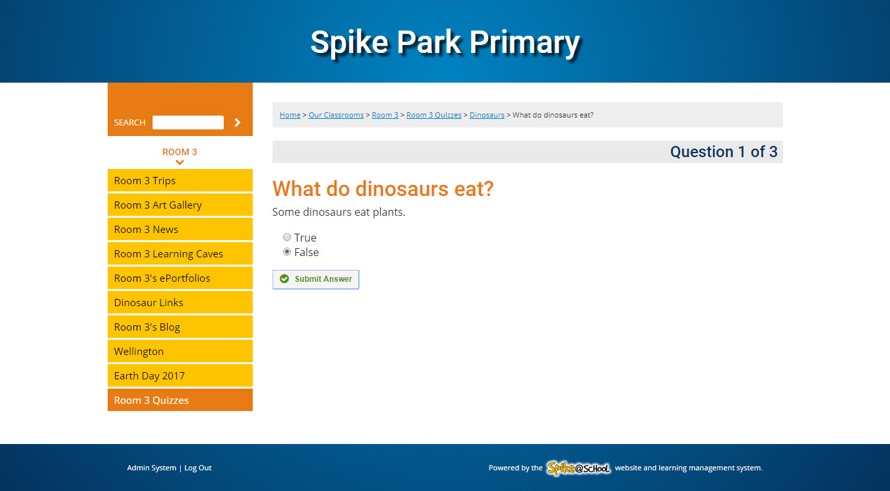
I’m going to select ‘False’ for the first Question so we can see how the final marking screen can direct us to Website Resources when we get a Question wrong.
For the second Question you can see that we can type freestyle words into the box, and also choose from a list of possible answers.
The last Question is easy. You can see how the Image File associated with the Question is readily available to be clicked on, and since there is only one correct answer to this Question, the Radio Buttons have been used instead of Checkboxes.
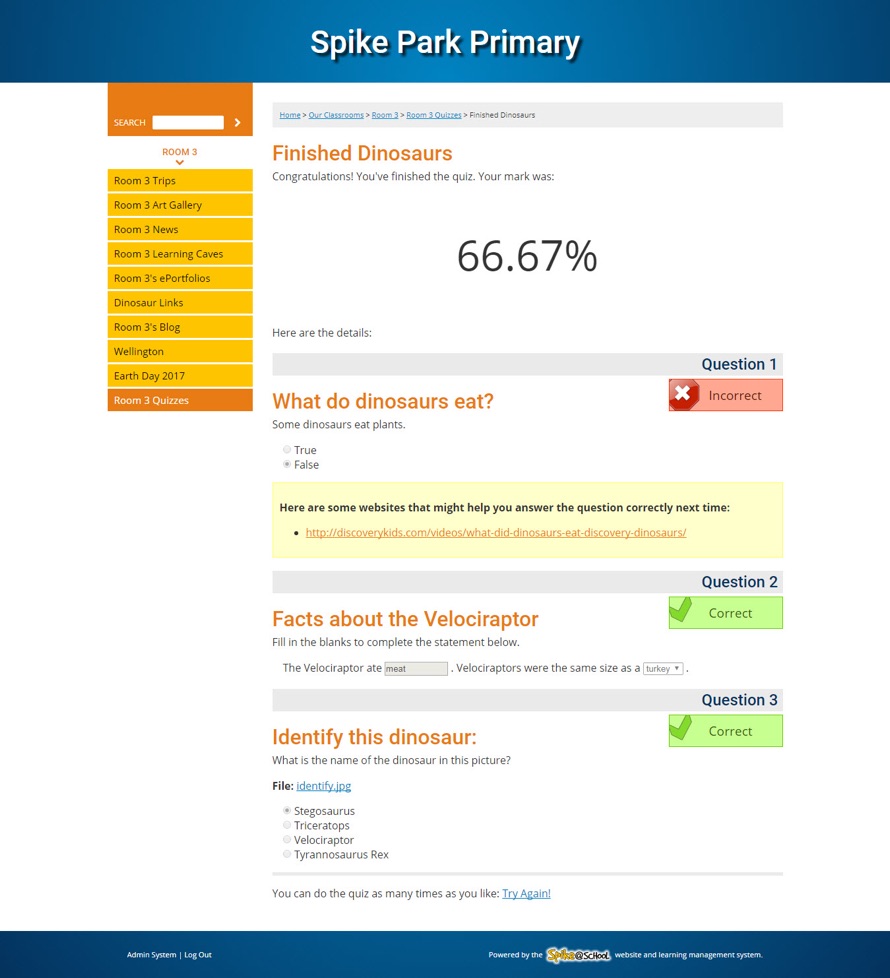
Now that we've answered all the Questions, let's see how many we got correct. As you can see in the image on the right, since we got Question 1 incorrect we have been provided with our Website Resource related to the Question.
An Interactive Learning Tool!
I’ve clicked on the Website Resource link and reminded myself about what dinosaurs ate so I’ll be sure to get that Question right next time I take the Quiz.
But, we passed! Actually, Quizzes in Spike@School aren't about passing or failing. The system doesn't collect marks, because we believe that our Quiz system is best used as a self-assessment tool.
Imagine setting up a Quiz at the start of a unit of work that covers everything you may be teaching throughout the unit. Students can take the Quiz at the start and end of the unit to see their progress, or simply use the Quiz as a means to see what knowledge they still need to acquire.
Better yet, Quizzes are available in Learning Caves and ePortfolios which means that students can create their own Quizzes! We think this is a great way for students to build their research skills and also to guide their own learning. Quizzes that are made inside of the Learning Caves can be taken by other students in the Cave. This is truly interactive learning!